Simple StudioHue DIY Wedding Ideas!
- babybirdhomedecor
- Sep 7, 2017
- 3 min read
Wedding costs can add up quickly and Pinterest fails happen too often! StudioHue Craft pARTies is here to help you create your own awesome wedding (or shower… or bachelor/ette) party favors and decor that are easy and won’t break the bank. Everything we use for these projects can all be purchased at your area craft store, home improvement store, or online retailer!
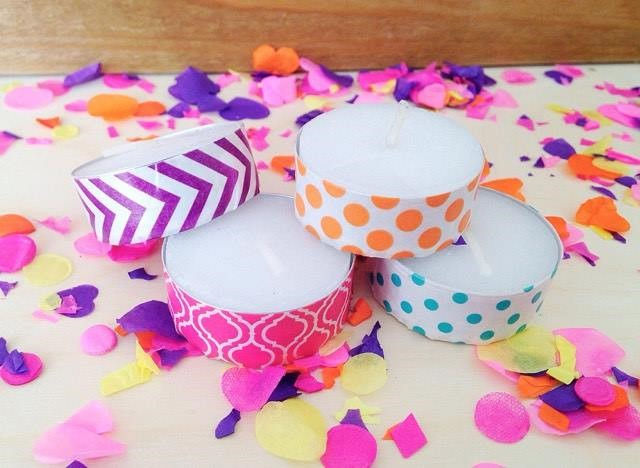
Craft: DIY Decorative Tea Lights Difficulty Level: It’s a breeze!
Supplies: Tea Lights | Washi Tape | Scissors
Directions: This is a simple way to add a pop of color to your tables or centerpieces for any of your wedding celebrations. Cut a piece of washi tape approximately 3.5 inches long and wrap it around the outside of the candle overlapping the ends. Wrap a few for each table in complementing designs and colors. Place on the table, light the candles, and voila – a festive centerpiece!


Craft: DIY Wine Charms Difficulty Level: Piece of (wedding) cake!
Supplies: 29×25 mm Charm/Bead/Earring Hoops | 20mm Metal Discs (with hole) | Letter Stamping Set | Seed Beads | Fine Tip Sharpie | Hammer | Cardboard | Paper towel
Directions: Begin by laying a piece of cardboard on the table to cushion the charm. Use the letter stamping set to hammer letters into the metal disc – hit the flat top of the letter stamp with one quick hit. The stamping word choices are endless – make something for you – bride, groom, his, hers; or a gift for someone else – maid of honor, mom, and more! Once hammering is complete, use the fine tip Sharpie to trace inside the letters on the disc. Wipe with a paper towel as soon as you finish to remove any stray lines from the marker. Place five seed beads on the loop, add the charm, then add five more seed beads and close the loop. Add the loop to a wine glass and it’s ready to gift to your favorite ladies!


Craft: DIY Coasters Difficulty Level: A walk down the aisle!
Supplies: Your Favorite Picture | 4.25” x 4.25” Tile | Felt| Water Based Sealant| Tacky Glue| Foam Brush| Ruler
Directions: First begin by cutting out a 4” x 4” square of your picture or design for your tile. If you create and print the design yourself, be sure to print it out using a laser printer. Next, cut a 4” x 4” square from the felt. Squeeze the tacky glue along the outline of the felt and place on the bottom of the tile. Brush a thin coat of Water Based Sealant on the top side of the tile. Place the image on top and use ruler to center. You can use the long edge of a popsicle stick to smooth your image and press out any bubbles. Let the coaster dry for approximately five minutes. Apply two thin coats of water based sealant over the image, letting it dry for approximately 5 minutes between each layer. Sealant will dry clear. Coasters will dry to the touch within 15-20 minutes and will be completely set after 24 hours when they can be stacked and gifted.

If doing it yourself isn’t your thing – don’t worry all of these items are for sale online at StudioHueEvents.com. We also create custom guest books, wedding signs, wedding gifts, and a variety of favor options. Looking for a unique bachelor/ette party idea? StudioHue also hosts bachelor and bachelorette parties groups of 12+ at a venue/home of your choice or at our new studio located at 50 Broadway in downtown Buffalo where the bride (or groom!) to be always crafts for free!
Hope to pARTy with you soon!
Come see StudioHue at our upcoming bridal show in Buffalo at Hotel Henry on October 15th!! Pre-sale tickets are available through our website here!


